


Layers for Grouping
Suggest EditAccordion
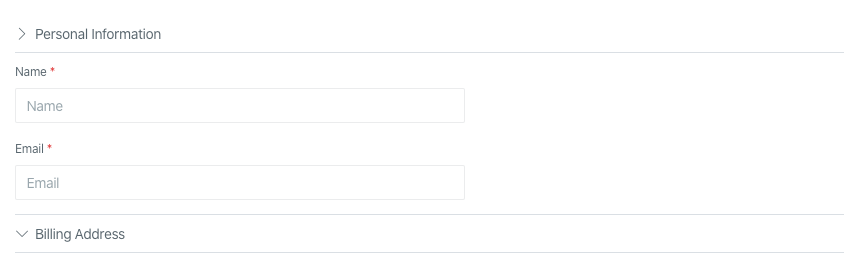
Accordions are useful when you want to switch between hiding and displaying a lot of content in a compact space. They consist of a series of collapsible panels, each containing a header and content. When a panel is expanded, its content becomes visible, while the other panels are collapsed.
Here is an example of an accordion:
To create an accordion in Orchid, you can use the Layout::accordion() method. This method accepts an array of
panel names and content, where the keys of the array will be used as the panel headers and the values will be used
as the panel content.
Here is an example of how to create an accordion using the short syntax:
use Orchid\Support\Facades\Layout;

public function layout(): array
{
    return [
        Layout::accordion([
            'Personal Information' => [
                Layout::rows([
                    Input::make('user.name')
                        ->type('text')
                        ->required()
                        ->title('Name')
                        ->placeholder('Name'),

                    Input::make('user.email')
                        ->type('email')
                        ->required()
                        ->title('Email')
                        ->placeholder('Email'),
                ]),
            ],
            'Billing Address'      => [
                Layout::rows([
                    Input::make('address')
                        ->type('text')
                        ->required(),
                ]),
            ],
        ]),
    ];
}
In the example above, the accordion has two panels: “Personal Information” and “Billing Address”. The content of
each panel is specified as an array of rows created using the Layout::rows() method.
You can also specify the content of each panel as the lowercase name of a class that returns an array of rows:
public function layout(): array
{
    return [
        Layout::accordion([
            'Personal Information' => PersonalInformationRow::class,
            'Billing Address'      => BillingAddressRow::class,
        ]),
    ];
}
Columns
Columns are useful when you want to group content horizontally. They allow you to divide the layout into multiple columns of equal width, which can be used to display content side by side.
Here is an example of columns:
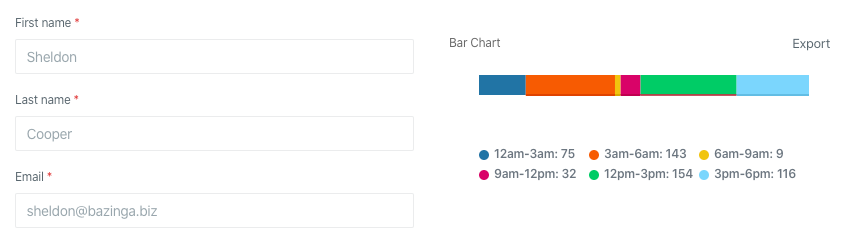
To create columns in Orchid, you can use the Layout::columns() method. This method accepts an array of content, which will be displayed in the columns.
Here is an example of how to create columns using the short syntax:
use Orchid\Support\Facades\Layout;

public function layout(): array
{
    return [
        Layout::columns([
           TableExample::class,
           RowExample::class,
        ]),
    ];
}
In the example above, the layout is divided into two columns, and the content of each column is specified as the lowercase name of a class.
Tabs
Tabs group content and help with navigation. Useful when you want to switch between hiding and displaying a lot of content:
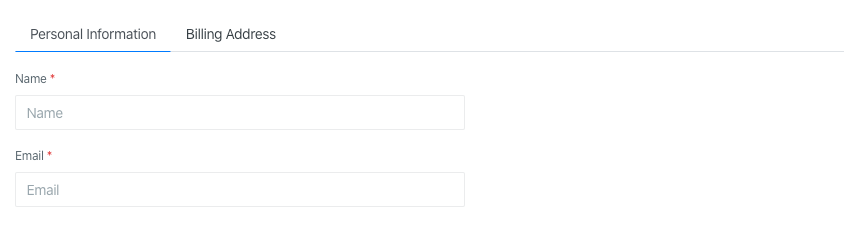
Tabs support short syntax by calling a static method, which does not require creating a separate class:
use Orchid\Support\Facades\Layout;

public function layout(): array
{
    return [
        Layout::tabs([
            'Personal Information' => [
                Layout::rows([
                    Input::make('user.name')
                        ->type('text')
                        ->required()
                        ->title('Name')
                        ->placeholder('Name'),

                    Input::make('user.email')
                        ->type('email')
                        ->required()
                        ->title('Email')
                        ->placeholder('Email'),
                ]),
            ],
            'Billing Address'      => [
                Layout::rows([
                    Input::make('address')
                        ->type('text')
                        ->required(),
                ]),
            ],
        ]),
    ];
}
Keys will be used as headers.
Please note that you can specify the lowercase name of the class as values:
public function layout(): array
{
    return [
        Layout::tabs([
            'Personal Information' => PersonalInformationRow::class,
            'Billing Address'      => BillingAddressRow::class,
        ]),
    ];
}
By default, the active tab will be either the first or the last active one.
If you need to define the active tab explicitly, you can do this using the ->activeTab($key) method
public function layout(): array
{
    return [
        Layout::tabs([
            'Personal Information' => PersonalInformationRow::class,
            'Billing Address'      => BillingAddressRow::class,
        ])->activeTab('Billing Address'),
    ];
}