

Layers for Grouping
Suggest EditSplit
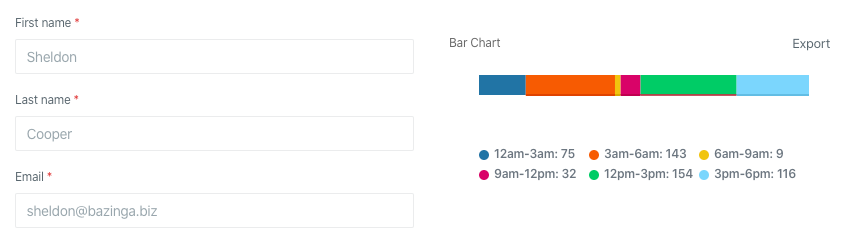
Allows you to divide the screen into two customizable sections. This layout is particularly useful when you want to display two separate pieces of information side-by-side.
Orchid provides a shortcut method for creating a Split layout with two views using the Layout::split() method.
To create a Split layout, simply pass an array of two Layout objects as the first parameter to the split() method.
You can also set the ratio of the two sections using the optional ratio() method as the second parameter.
Here’s an example of how to create a Split layout:
use Orchid\Support\Facades\Layout;

Layout::split([
    Layout::view('first-view'),
    Layout::view('second-view'),
]);
Customizing the Ratio
By default, the Split layout divides the screen with a 50/50 ratio. However, you can easily customize this ratio using the ratio() method.
This method takes a string argument that specifies the desired ratio. Here are the valid ratios:
- 20/80
- 30/70
- 40/60
- 50/50
- 60/40
- 70/30
- 80/20
For example, to create a Split layout with a 40/60 ratio:
use Orchid\Support\Facades\Layout;

Layout::split([
    Layout::view('first-view'),
    Layout::view('second-view'),
])->ratio('40/60'),
Reversing the Order on Mobile
By default, the order of the two sections in a Split layout is fixed.
However, you can reverse the order of the sections on mobile devices by calling the reverseOnPhone() method. Here’s an example:
use Orchid\Support\Facades\Layout;

Layout::split([
    Layout::view('first-view'),
    Layout::view('second-view'),
])->ratio('40/60')->reverseOnPhone(),
This will create a Split layout with a 40/60 ratio, and the order of the sections will be reversed on mobile devices.
Sortable
Sortable in the Orchid platform simplifies managing the order of elements in your application. You will be able to easily change the order of items in your list and create interactive user interfaces through a simple drag and drop function. This significantly facilitates working with ordered elements in the user interface.
Preparing the Database
To start using the sorting functionality, you need to prepare the database. To do this, create a migration that adds a simple integer column to the table you plan to work with. Here’s an example migration:
use Illuminate\Support\Facades\Schema;
use Illuminate\Database\Schema\Blueprint;
use Illuminate\Database\Migrations\Migration;

class AddOrderColumnToTable extends Migration
{
   /**
    * Run the migrations.
    *
    * @return void
    */
   public function up()
   {
       Schema::table('table_name', function (Blueprint $table) {
           $table->integer('order')->default(1);
       });
   }

   // ...
}
Replace table_name with the name of the table to which you want to add the column. You can also choose any other name for the column by replacing 'order' with the preferred name.
Don’t forget to run the migration using the
php artisan migratecommand to add the new column to the database.
Preparing the Eloquent Model
After setting up the database and migrations, add the Sortable trait to your model:
use Illuminate\Database\Eloquent\Model;
use Orchid\Platform\Concerns\Sortable;

class Idea extends Model
{
    use Sortable;

    //...
}
Note: Make sure to import the Eloquent model class and then use the
Sortabletrait.
If the column name is different from order, you can add a getSortColumnName() method to your model to explicitly specify the column name:
use Illuminate\Database\Eloquent\Model;
use Orchid\Platform\Concerns\Sortable;

class Idea extends Model
{
    use Sortable;

    //...

    /**
     * Get the column name for sorting.
     *
     * @return string
     */
    public function getSortColumnName(): string
    {
        return 'sort';
    }
}
Usage in a Screen
Now we have a prepared model with sorting functionality. Let’s create a graphical interface for drag and drop sorting. In the query() method of your screen, specify the list of models that will be displayed for sorting:
use App\Models\Idea;
use Orchid\Screen\Repository;

public function query(): array
{
   return [
       'models' => Idea::sorted()->get(),
   ];
}
Here, we use the sorted() method provided by the Sortable trait to get a sorted list of models. It also has an optional argument for sorting direction (ASC – ascending, DESC – descending). By default, the value is set to ASC.
In the layout() method of your screen, add the graphical interface using the Layout::sortable() layer:
use Orchid\Support\Facades\Layout;
use Orchid\Screen\Sight;

public function layout(): iterable
{
   return [
       Layout::sortable('models', [
           Sight::make('title'),
       ]),
   ];
}
Columns
Columns are useful when you want to group content horizontally. They allow you to divide the layout into multiple columns of equal width, which can be used to display content side by side.
Columns differ from
Splitin that they always have the same width and there can be many of them.
Here is an example of columns:
To create columns in Orchid, you can use the Layout::columns() method. This method accepts an array of content, which will be displayed in the columns.
Here is an example of how to create columns using the short syntax:
use Orchid\Support\Facades\Layout;

public function layout(): array
{
    return [
        Layout::columns([
           UserProfileForm::class,
           ContactInformationForm::class,
        ]),
    ];
}
In the example above, the layout is divided into two columns, and the content of each column is specified as the lowercase name of a class.
TabMenu
The TabMenu layout allows you to display navigation items visually similar to tabs, but instead of switching between tabs, clicking on an item will navigate to a different screen.
To create a TabMenu layout, you can use the artisan command:
php artisan orchid:tab-menu ExampleNavigation
This will create a new class called ExampleNavigation in the app/Orchid/Layouts directory. You can define the navigation items in this class by implementing the navigations method:
namespace App\Orchid\Layouts;

use Orchid\Screen\Actions\Menu;
use Orchid\Screen\Layouts\TabMenu;

class ExampleNavigation extends TabMenu
{
    /**
     * Get the menu elements to be displayed.
     *
     * @return Menu[]
     */
    protected function navigations(): iterable
    {
        return [
            Menu::make('Get Started')
                ->route('platform.main'),
        ];
    }
}
You can specify the items in the same way as in the Menu section
use App\Orchid\Layouts\ExampleNavigation;

public function layout(): array
{
    return [
        ExampleNavigation::class
    ];
}
Tabs
Tabs group content and help with navigation. Useful when you want to switch between hiding and displaying a some of content:
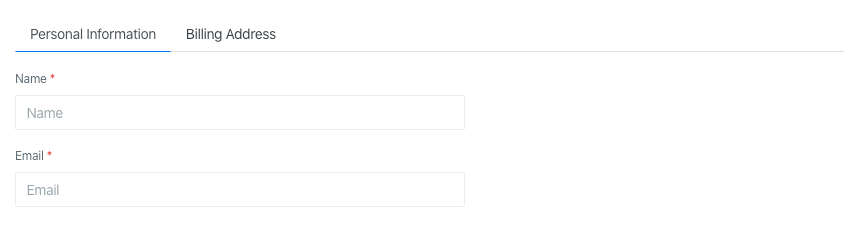
Tabs support short syntax by calling a static method, which does not require creating a separate class:
use Orchid\Support\Facades\Layout;

public function layout(): array
{
    return [
        Layout::tabs([
            'Personal Information' => [
                Layout::rows([
                    Input::make('user.name')
                        ->type('text')
                        ->required()
                        ->title('Name')
                        ->placeholder('Name'),

                    Input::make('user.email')
                        ->type('email')
                        ->required()
                        ->title('Email')
                        ->placeholder('Email'),
                ]),
            ],
            'Billing Address'      => [
                Layout::rows([
                    Input::make('address')
                        ->type('text')
                        ->required(),
                ]),
            ],
        ]),
    ];
}
Keys will be used as headers.
Please note that you can specify the lowercase name of the class as values:
public function layout(): array
{
    return [
        Layout::tabs([
            'Personal Information' => PersonalInformationRow::class,
            'Billing Address'      => BillingAddressRow::class,
        ]),
    ];
}
By default, the active tab will be either the first or the last active one.
If you need to define the active tab explicitly, you can do this using the ->activeTab($key) method
public function layout(): array
{
    return [
        Layout::tabs([
            'Personal Information' => PersonalInformationRow::class,
            'Billing Address'      => BillingAddressRow::class,
        ])->activeTab('Billing Address'),
    ];
}
Accordion
Accordions are useful when you want to switch between hiding and displaying a lot of content in a compact space. They consist of a series of collapsible panels, each containing a header and content. When a panel is expanded, its content becomes visible, while the other panels are collapsed.
Here is an example of an accordion:
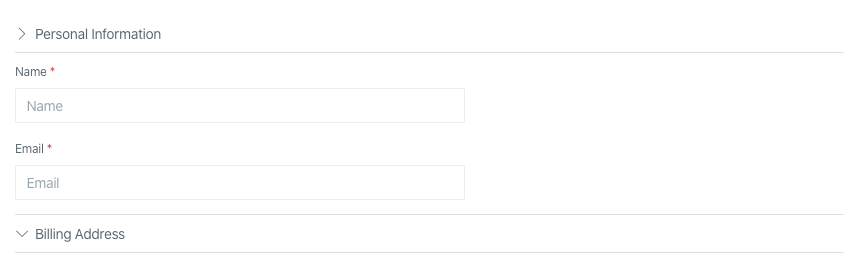
To create an accordion in Orchid, you can use the Layout::accordion() method. This method accepts an array of panel names and content, where the keys of the array will be used as the panel headers and the values will be used as the panel content.
Here is an example of how to create an accordion using the short syntax:
use Orchid\Support\Facades\Layout;

public function layout(): array
{
    return [
        Layout::accordion([
            'Personal Information' => [
                Layout::rows([
                    Input::make('user.name')
                        ->type('text')
                        ->required()
                        ->title('Name')
                        ->placeholder('Name'),

                    Input::make('user.email')
                        ->type('email')
                        ->required()
                        ->title('Email')
                        ->placeholder('Email'),
                ]),
            ],
            'Billing Address'      => [
                Layout::rows([
                    Input::make('address')
                        ->type('text')
                        ->required(),
                ]),
            ],
        ]),
    ];
}
In the example above, the accordion has two panels: “Personal Information” and “Billing Address”. The content of each panel is specified as an array of rows created using the Layout::rows() method.
You can also specify the content of each panel as the lowercase name of a class that returns an array of rows:
public function layout(): array
{
    return [
        Layout::accordion([
            'Personal Information' => PersonalInformationRow::class,
            'Billing Address'      => BillingAddressRow::class,
        ]),
    ];
}
